Instructions
1. Mixing the Dough
In a large bowl, combine all the ingredients: bread flour, water, sourdough starter, honey, olive oil, and salt. Stir until combined, then knead the dough until it becomes soft and smooth.
2. Resting the Dough
Cover the dough and let it rest for 1 hour. This resting time helps the dough relax and start developing its structure.
3. Stretch and Fold
After 1 hour, perform the first stretch and fold. Let the dough rest for another hour, then repeat the stretch and fold process one more time. This technique helps strengthen the dough without overworking it.
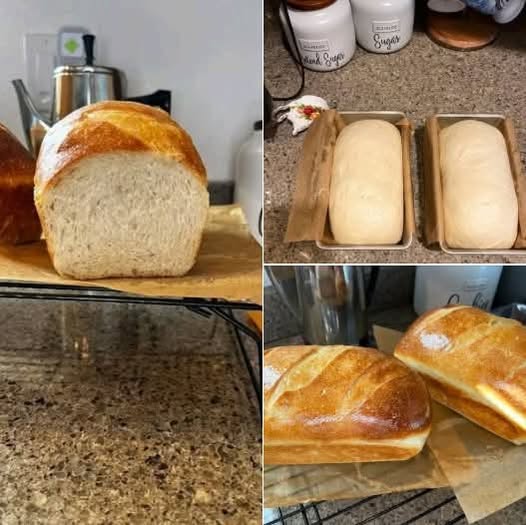
4. Shaping the Dough
Once the dough has rested and been folded, turn it out onto a clean counter. Stretch it out into a rectangle, then gently roll it up to form a cylinder. Place the dough into a greased bread pan. For easy removal later, line the pan with parchment paper.
5. Proofing
Cover the pan with plastic wrap and let the dough rise at room temperature until it has doubled in size. This can take anywhere from 1 to 2 hours depending on the temperature of your kitchen.
6. Refrigeration
Once the dough has doubled in size, cover the pan tightly with plastic wrap and place it in the fridge for a few hours. For best results, you can leave it overnight in the fridge to develop more flavor.
7. Baking the Loaf
Preheat your oven to 375°F (I use 400°F because I’m at 5200 feet altitude). Bake the loaf for about 40 minutes. The top should be a soft golden brown. I recommend covering the top with lightly resting foil to prevent the crust from browning too much.
8. Finishing Touches
Remove the bread from the pan and immediately butter the top for a soft, golden finish. Let the loaf cool completely before slicing, but who are we kidding? If you’re like me, you’ll likely slice into it warm, straight out of the oven!
Why This Sourdough Sandwich Loaf Is a Winner
This sourdough sandwich loaf is the perfect balance of chewy and soft—making it ideal for sandwiches, toast, or simply enjoying with a bit of butter. The honey and olive oil provide subtle flavor without overpowering the natural sourdough taste. It’s a loaf that’s sturdy enough to handle any filling but still soft enough for everyday use.
Tips for Success
- Use Active Starter – Make sure your sourdough starter is active and bubbly to ensure a good rise.
- Altitude Adjustment – If you live at a higher altitude like I do, increase your baking temperature slightly to account for lower air pressure.
- Let It Cool – For the perfect slices, let the loaf cool completely before cutting. This helps the texture set and prevents the bread from becoming too crumbly.
Final Thoughts
After making sourdough sandwich loaves, I can confidently say this will be our go-to style of bread from now on. It’s easy to make, incredibly versatile, and perfect for daily use. Whether you prefer to toast it, make a sandwich, or just enjoy a slice with butter, this bread is a game-changer.
